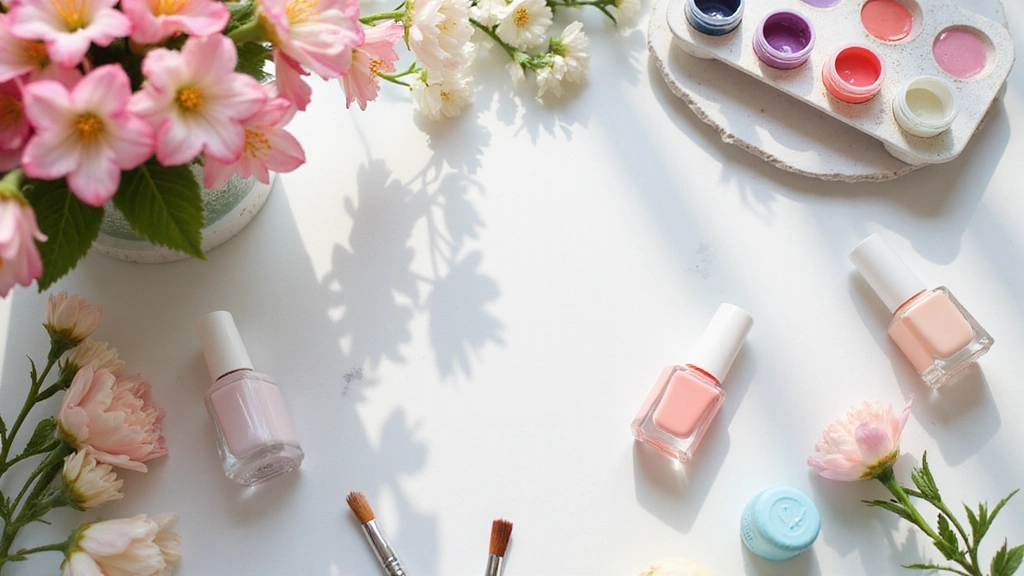
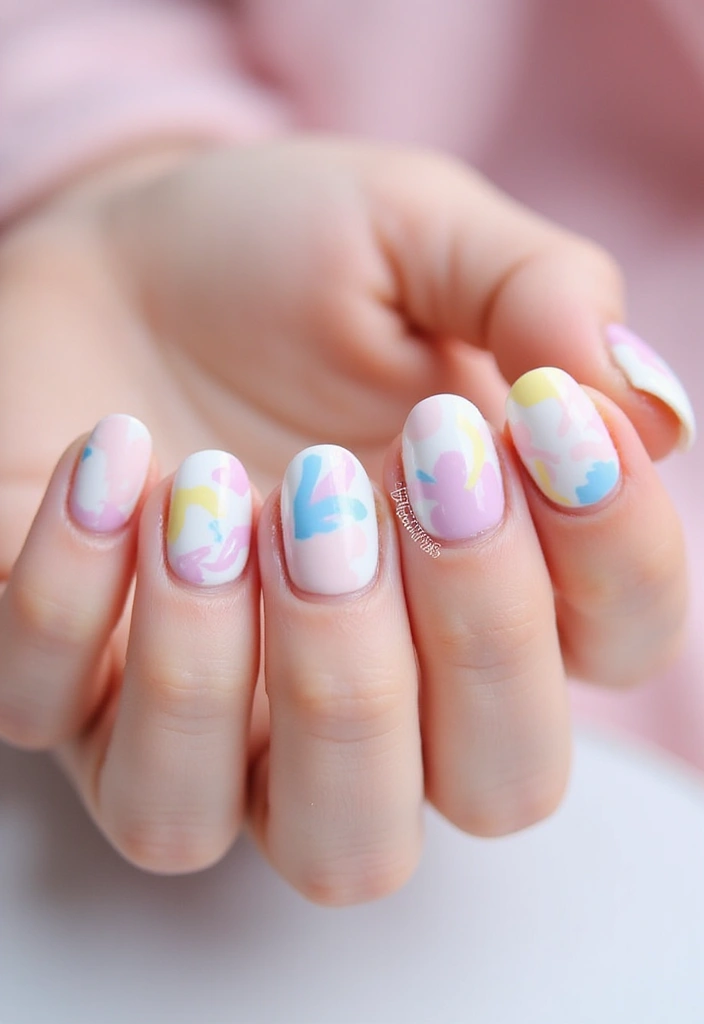
Spring is the perfect time to embrace the soft, whimsical beauty of pastel nails!
With a palette that includes delicate pinks, baby blues, soft lilacs, and mint greens, pastel nail art can breathe life into any spring outfit.
In this article, we’ll walk you through eight stunning tutorials that will transform your nails into a canvas of pastel perfection. Each step-by-step guide is designed for ease, allowing even beginners to create beautiful designs that capture the essence of this rejuvenating season.
So gather your nail supplies and let’s get started on this colorful journey to nail art mastery!
Contents
- 1. Soft Ombre Pastel Nails
- 2. Pastel Floral Nail Art
- 3. Geometric Pastel Designs
- 4. Rainbow Pastel Swirls
- 5. Pastel French Tips
- 6. Pastel Glitter Accent Nails
- 7. Pastel Color Block Nails
- 8. Pastel Marble Effect
1. Soft Ombre Pastel Nails

To achieve stunning soft ombre pastel nails, begin by applying a base coat of your lightest pastel hue, such as a delicate soft pink.
Once this layer has dried, take a makeup sponge and dab on two or three additional pastel shades, blending them from the cuticle to the tip to create a smooth, gradient effect.
After you’re satisfied with the ombre look, finish off the design by applying a quick-dry top coat for a glossy shine that enhances the vibrant colors.
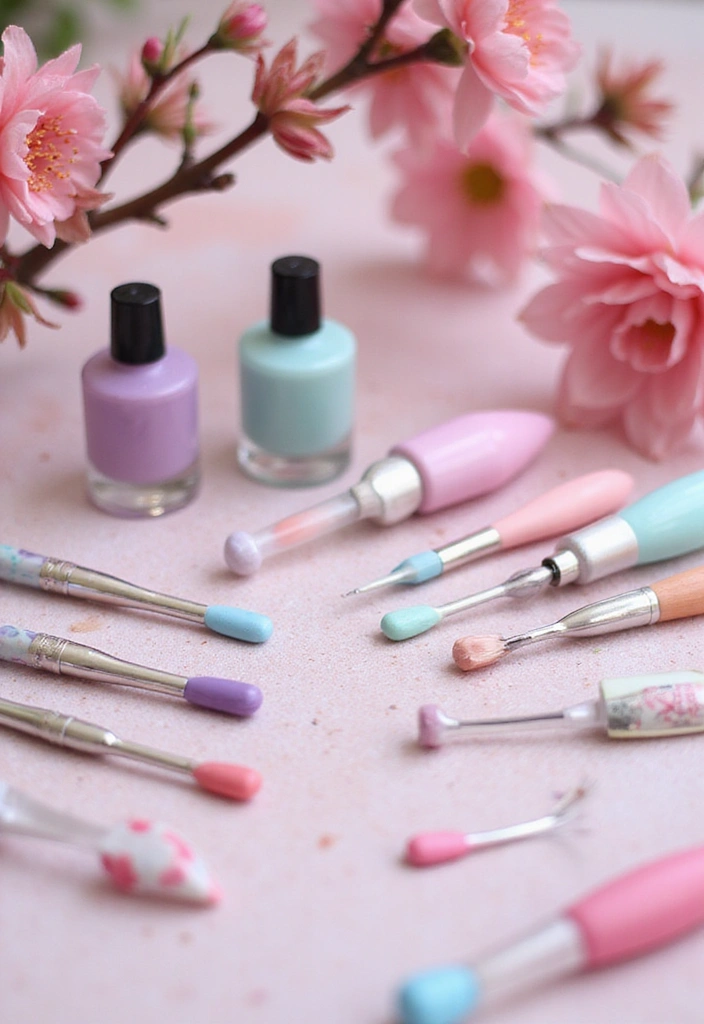
To keep your nails healthy and well-moisturized, don’t forget to use some cuticle oil. This chic yet understated style is perfect for spring, reminiscent of blooming flowers. Feel free to experiment with delightful color combinations, such as lavender transitioning to mint green, for a truly enchanting effect! For best results, consider using a pastel nail polish set to have all the shades you need at your fingertips.
2. Pastel Floral Nail Art
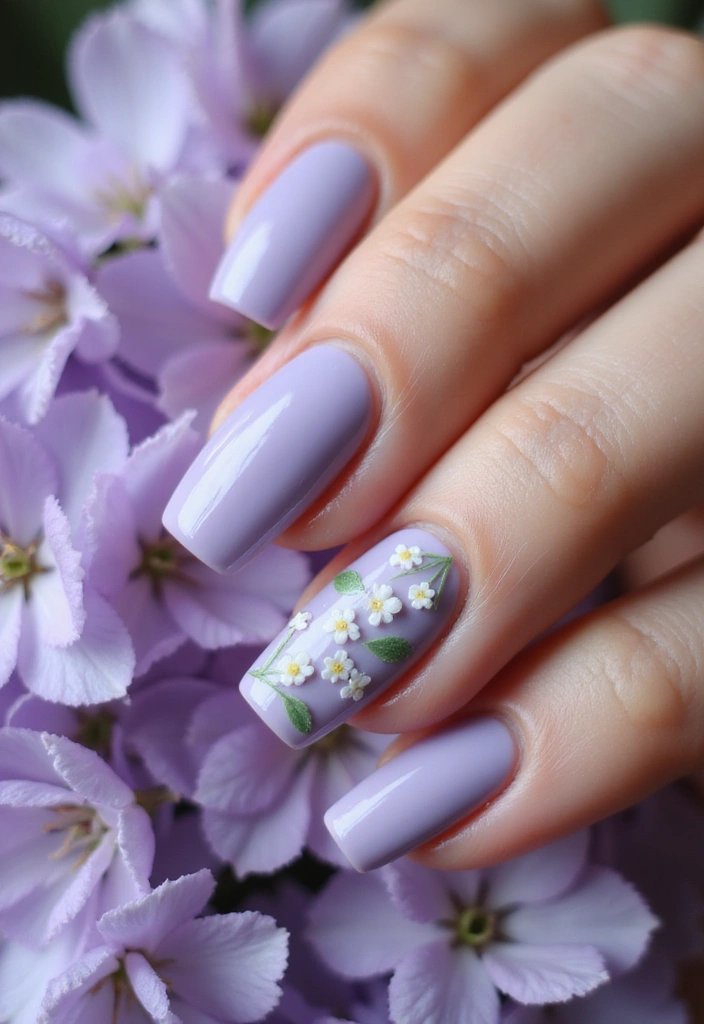
Embrace the beauty of spring with charming pastel floral nail art that will brighten up your look.
Begin by applying a solid pastel base color, such as a soft lilac, to your nails. To achieve the intricate floral designs, utilize a fine nail brush like this one from nail art brushes. Once your base coat is completely dry, carefully paint delicate flowers using white and yellow polish, and don’t forget to incorporate tiny green leaves for that perfect garden effect.
For those intricate flower details, consider using dotting tools to create perfectly shaped petals. This gorgeous design is ideal for special occasions such as spring weddings or brunches, allowing you to carry a touch of nature right at your fingertips.
Lastly, seal your beautiful artwork with a quick-dry top coat to protect your nails and add a stunning glossy finish. To elevate your nail art game further, explore a fantastic selection of colors with a pastel nail polish set that will inspire your spring creations!
3. Geometric Pastel Designs
For those who appreciate a contemporary flair, geometric pastel designs are the perfect choice for your nails this spring.
Begin by applying a base coat in a neutral shade to create a clean canvas. Once your base is dry, grab some nail tape to outline your desired shapes on each nail.
Next, paint the exposed areas with an array of beautiful pastel colors, and then carefully peel away the tape to unveil crisp, defined lines. This trendy design not only showcases your artistic side but also opens up a world of possibilities with different color pairings and geometric patterns.
To ensure your nails are perfectly shaped before you start, don’t forget to use a reliable nail file. These geometric pastel creations look especially chic when paired with minimalist outfits, making for a stylish statement that captures attention.
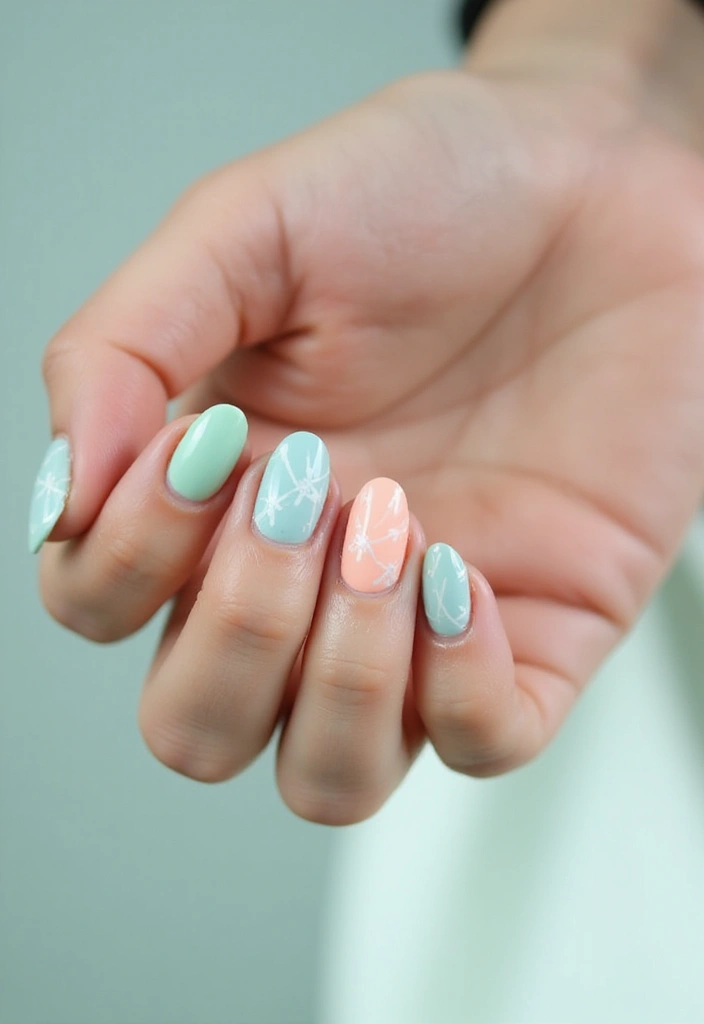
4. Rainbow Pastel Swirls

Transform your nails into a vibrant canvas with delightful rainbow pastel swirls this spring!
Start off with a solid base coat of white polish to ensure that the pastel colors truly stand out. Using thin nail brushes, create whimsical swirling patterns with a variety of shades from a pastel nail polish set. Blend the colors gently for a dreamy, eye-catching effect.
This playful design is perfect for anyone looking to showcase their love for vibrant hues, making it ideal for festivals or casual gatherings. Don’t forget to seal your masterpiece with a top coat to ensure your swirls stay stunning for days to come!
5. Pastel French Tips
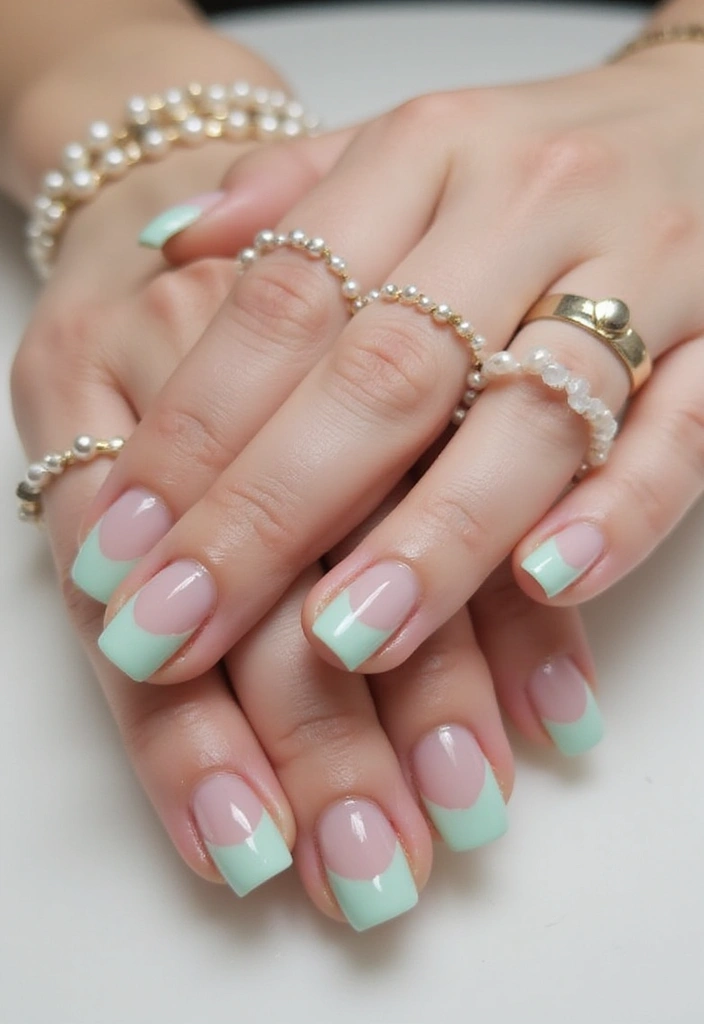
Elevate the timeless elegance of a classic French manicure by adding a delightful pastel twist!
Begin by applying a sheer pink base coat to create a soft and subtle foundation. Once your base coat is completely dry, take a thin nail brush and carefully paint the tips of your nails with a gentle hue, such as soft mint green or baby blue from a pastel nail polish set.
This chic design strikes the perfect balance between elegance and playfulness, making it suitable for any occasion where you want to look polished yet stylishly on-trend.
To complete your manicure, don’t forget to apply a top coat for nails to enhance shine and ensure longevity, giving your pastel French tips that freshly done look for days on end!
6. Pastel Glitter Accent Nails

Elevate your pastel nail game by incorporating stunning glitter accents for a glamorous finish!
Start by selecting a base color from your favorite pastel palette and apply it to the majority of your nails. For a captivating twist, choose a glitter nail polish that complements your base color and apply it to your accent nails. You can find a fantastic selection of glitter nail polish here.
This chic look is perfect for special occasions or nights out, adding just the right amount of sparkle while maintaining a soft and feminine aesthetic. To ensure your manicure lasts and your glitter shines bright, be sure to seal everything in with a high-quality top coat, which you can find here.
And don’t forget to keep your nails in shape! A good nail file is essential for achieving that polished look, and you can grab one here.
Complete your pastel nail collection with a beautiful pastel nail polish set, available here, to explore a variety of shades and unleash your creativity!
7. Pastel Color Block Nails

Unleash your creativity with pastel color block nails this spring!
Begin by applying a base coat to protect your nails. Next, grab some nail tape for designs to section off different areas of your nails. Choose a variety of shades from a pastel nail polish set and fill in each section with a unique color for a striking and playful look.
This nail art style is perfect for those who love to experiment and express their personality through bold color combinations.
To finish off your stunning design, apply a glossy top coat for nails for a sleek and polished appearance. Don’t forget to keep your nails in shape with a nail file for that perfect finish!
8. Pastel Marble Effect
Achieve an elegant marble effect with pastel colors for a sophisticated nail look that is perfect for spring.
Begin by applying a white base coat to your nails, which you can find at this white base coat.
Next, prepare for the marbling process by using a variety of pastel nail polishes. A great choice is this pastel nail polish set, which offers a beautiful range of colors.
Drop the different polishes onto a water surface and gently swirl them together to create a stunning marble pattern.
Now, dip your nails into the water to transfer the design, ensuring each nail has a unique and artistic look.
For best results, consider using a water marbling nail kit to streamline the process.
Finally, seal your masterpiece with a shiny top coat to protect the artwork and enhance the marble effect, leaving you with a chic and understated nail design.
Conclusion
Spring is the ideal season to experiment with pastel nail designs that capture the beauty of nature in bloom.
With these eight tutorials, you can easily enhance your spring look and express your personality through your nails.
So gather your supplies, embrace creativity, and let your nails shine with soft pastel hues this season!
Note: We aim to provide accurate product links, but some may occasionally expire or become unavailable. If this happens, please search directly on Amazon for the product or a suitable alternative.
This post contains Amazon affiliate links, meaning I may earn a small commission if you purchase through my links, at no extra cost to you.


Leave a Reply